
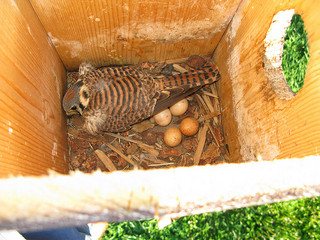
American Kestrel Nest Box Plans
Here are free American Kestrel nest box plans, information and tips when building and placing your box. American Kestrels are cavity nesters. They do not excavate their own nest cavities, but use natural cavities or old holes created by woodpeckers (mainly flickers).
There are many places where natural cavities or old woodpecker holes are limited. Building a Kestrel nest box is a good way to help the local population. In most cases, if you build it, they will come.
Click on American Kestrel nest box plans below for a larger version for printing.
I have seen boxes of various sizes, designs, materials and placement successfully used by American Kestrels.
The main thing is that no box is a bad box and at least we tried. But a few tips will make the nest box last longer, be occupied more often, potentially fledge more young and potentially have less problems with predators or disease.
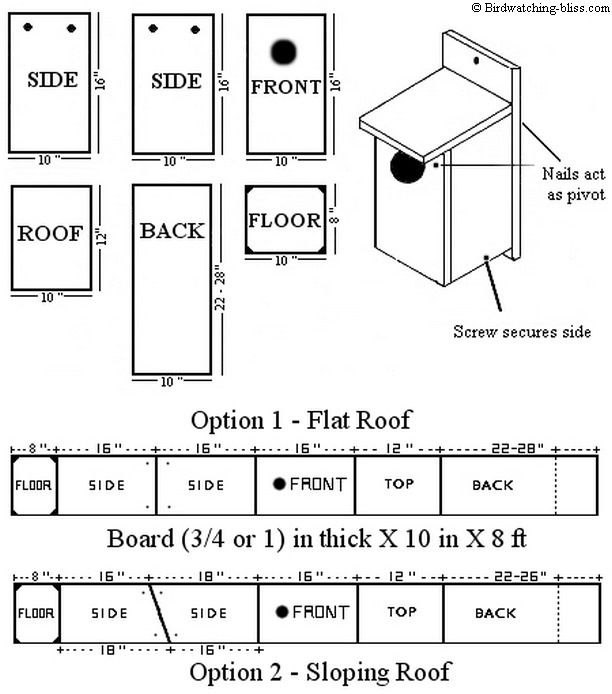
American Kestrel Nest Box Plans
Here is the layout with detailed instructions below.
Floor
Boxes that I have built or plans that I have seen all had floor plans of at least 8X8 to 12X12 inches. In my opinion, 8X8 in. is too small, so I recommend at least 8X10 in, but there is no need to be larger than 12X12 inches.
Hole Size
The recommended hole size for the American Kestrel nest box is 3 inches. Kestrels use natural cavities made by woodpeckers (mainly Flickers). Recommended holes for Flicker nest boxes range from 2 to 3 inches. Couldn't a Kestrel use a 2? inch hole? Probably, but seems like everyone recommends a 3 inch hole, so why reinvent the wheel. There has also been some discussion about using slots instead of holes or that holes should be elongated instead of round.
Height
The recommended heights of the nest boxes range from 12 to 20 inches. The critical part of this measurement is the depth of the box below the hole. Nine to 12 inches seems to be the most preferred.
Since the size of the hole is 3 inches, that makes the top of the hole 12-15 inches. The birds need a couple of inches for "wiggle room" as they go in the hole, so the box height should be 14-18 inches tall. A taller box is probably not a bad thing, but it's just a waste of lumber that could be used on another nest box.
Roof
The box now needs a roof. Our choices are fairly simple. Flat or a sloping & overhang or flush.
A slopped roof should help shed rain better than a flat roof. An overhanging roof will prevent water from getting into the box better than a flush roof. The overhang may also provide some shade depending upon the orientation of the nest box. A kerf or grove can also be cut across the roof to act as a gutter and let water drain to the sides of the box instead of drip off the front.
Back
The back of the box just needs to be long enough to attach the box to something. The nest box plans above has the back between 22-28 inches. There is no need for the back to extend more than 3 or 4 inches above or below the box. I have seen other plans refer to the left over 6 or 8 inches, "scrap", but that is enough for part of a bluebird or chickadee box.
Nest Box Construction Material
1st choice - untreated, solid stock.
2nd choice - exterior grade plywood
Thickness of stock
The thickness of the stock determines the thermal insulation of the nest box. It can get cold in the Spring and always gets hot in the Summer sun.
A one inch thick box will protect eggs and young from temperature extremes more than a half-inch thick box. This doesn't mean that a half-inch box is useless (I have a half-inch thick blue-bird box that fledged 3 tree swallows last summer, but the box is on my front porch and is shaded in the afternoon).
Thicker stock is also heavier and more expensive than thinner stock, but it will also create a sturdier box if constructed properly.
Any stock thickness between one-half in up to one inch should be acceptable for a nest box. If your area is notorious for cold nights in the Spring or if your nest box is to be placed in full sun (with no shade), you may want to go with thicker stock or build a double roof with an airspace between the layers.
Smooth or rough?
We all like the feel of a smooth sanded wood, but the truth is, the birds benefit from a rough surface. A rough surface helps the adults to cling to the side of the box when bringing the nesting material and when feeding the young. It also helps the young scramble out of the box when it is time to go. We should even score or kerf the wood inside the box under the hole.
Perch or no perch?
If rough wood helps the birds to "hang on", wouldn't it help to add a perch? It probably would... but it also helps cats, raccoons, snakes and other nest predators to hang on to the perch while they fish around inside for something to eat. So no perch.
Painted or unpainted?
If kept dry, unpainted wood will last a long time and looks more natural.
White paint will keep the box cooler, but may look out of place or draw attention to the nest box.
Spar varnish has also been recommended to preserve the wood.
If painting or varnishing, do not paint the inside of the box and don't paint inside the entry hole. Also, be sure to use a non-toxic paint.
Drainage - Holes or cut corners of floor?
It probably doesn't matter too much, just make sure that if any water gets into the box, it can drip out. If nestlings get wet they can become hypothermic and die. I prefer to cut 1/4 -1/3 inches off each of the 4 corners of the floor.
Ventilation - Holes, Gaps or none?
Much of the information I have seen recommends that some kind of ventilation be used to help keep the nest box cool. Either drill some 1/4 inch holes near the top of both sides, or leave a small gap.
Some recent information from Wisconsin on Bluebird nest boxes has shown that boxes without ventilation holes are more successful, because of black flies (presumably, black flies need more light). So ventilation holes for Bluebird nest boxes in Wisconsin may not be necessary.
Access to the American Kestrel nest box for nest checks and cleaning.
If we nail everything shut when we build the nest box, we will not be able to check on the eggs or young or clean the nest box out. So, we must have some kind of access panel. I have seen boxes that open from the top, the sides or the front. (Never saw a box open from the bottom). I recommend either a side or front opening box, because it is too hard to get to the top of a nest box that is high off the ground. This is easily done by using only 2 nails near the top of the box on one side or the front. These nails will act as pivots and the side (or front) will rotate up. Secure the side or front with a single screw at the bottom.
Hardware
I prefer to keep things simple. No hinges, no latches, just galvanized or stainless nails and screws. You can add hinges or latches as you see fit, but use hardware that will not rust, so the nest box will last longer.
Nesting Material
American Kestrels (as with all falcons) do not build a nest other than to scrape together wood chips or gravel to use as a nest. To mimic the inside of a natural cavity, we should put some wood chips, maybe an inch deep, but not too much, and do not use sawdust.
Your American Kestrel Nest Box is now ready to be put somewhere so the kestrels can use it, but we do need to put the nest box near the proper habitat to have a chance to attract the kestrels and for them to nest successfully.
Note: Please also read the American Kestrel Nest Box Placement page and the Making Bird Houses - Construction Tips for more information about nest box construction, attachment methods, nest checks and tips on increasing nesting success and reducing nest box predation.
American Kestrel Nest Box Study
More Tips about American Kestrel Bird House Plans:
American Kestrel Identification and Photos
American Kestrel Bird Identification
How to Build a Bird House from Hollowing Out a Log
|
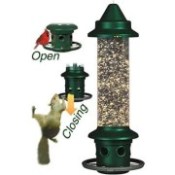
Our Favorite Bird Watching Binoculars, Squirrel-Proof Feeder & Hummingbird Feeder Read Our Reviews: |
||
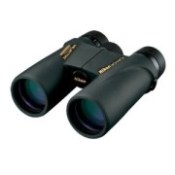
Nikon Monarch M5
Best mid-priced bird watching binoculars. Waterproof, shockproof, multi-coated ED-Glass. |
|
Best Hummingbird Feeder
Drip-Free, Ant-moat, Durable, Easy to Fill and Clean. |
| Click Images or Links To View More Info | ||